Benefits of Timely Brake Repair Tips For Your Truck

Do you know the importance of timely brake repair and maintenance? Brakes are an essential part of every truck, which enables you to control your truck while on the motion. You should ensure the brakes are functional before starting your engine.

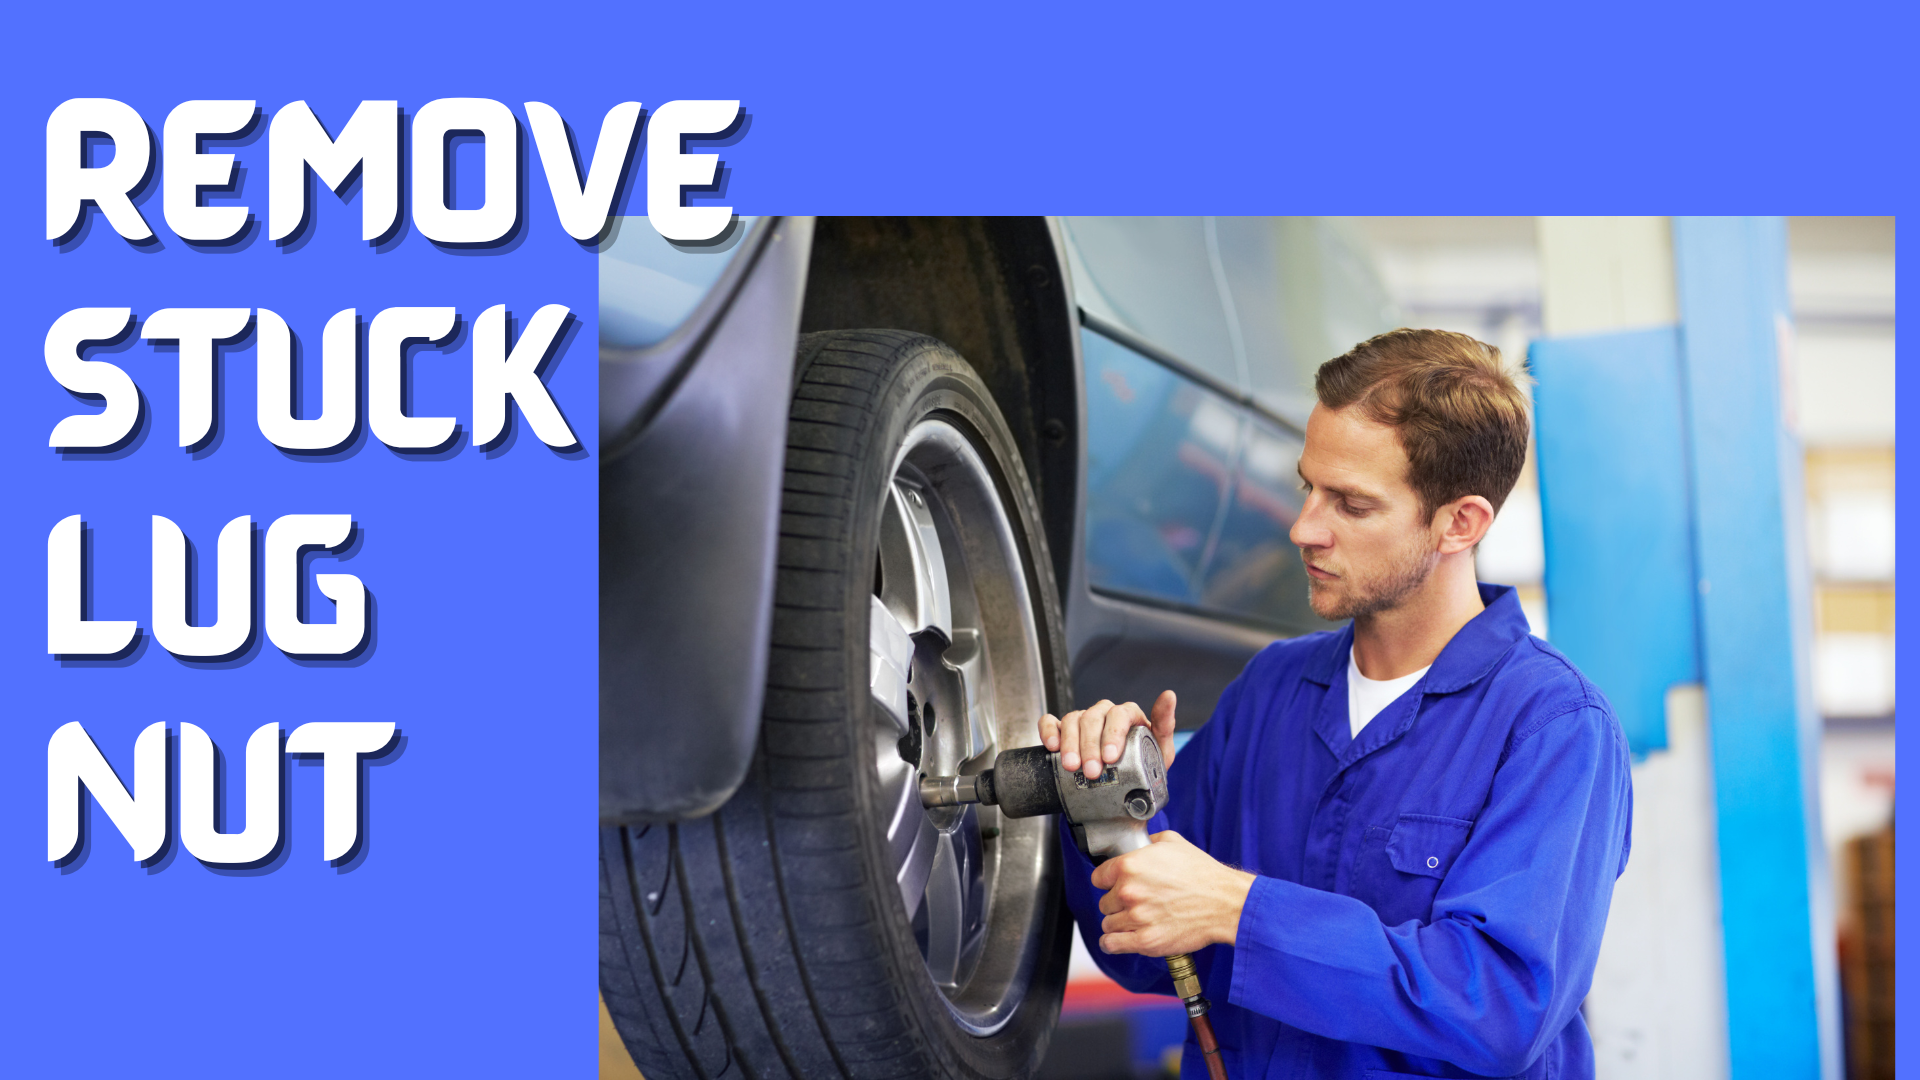
Brakes are some of the critical parts you must service when maintaining your truck. If your brakes are faulty, your life and other road users will be at risk. For this reason, it is essential to be alert and note when your brakes need a repair service. You will enjoy some of the below benefits when you perform a timely brake repair for your truck.

Gives Your Truck a Long-Life Span

The overall life span of your truck increases when you repair your brakes in time. It is the brakes that control your truck. When they are faulty, the chances that your truck will hit the road potholes and bumps are high. Other parts, such as the shocks, will be damaged when this happens. All these reduce the lifespan of your truck.

You will have Peace of Mind

If you repair your brakes in time, you will be confident and have peace of mind knowing that you and your passengers are safe. You can comfortably take full control of your truck when in motion. You will be sure of reduced braking distance since the brakes will engage as soon as you apply them.

You Will be Safe on the Road

Effective brakes prevent road accidents by enabling you to stop your truck when needed. Bad brakes cause brake fade, brake fluid leaks, and brake failure. All these problems can lead to a longer stopping distance.

An increase in the stopping distance increases the chances of your truck causing an accident.

Increases Fuel Economy

Properly functioning brakes will slow down your truck efficiently, saving you money at the fuel station.

Your truck will require a lot of pressure to stop if your brakes are old, reducing fuel economy. Brake repairs will let you get the most from your truck regarding usage and general performance.

Saves You From Costly Brake Repair

When you repair your brakes in time, you will not have to do major repairs in the future. But if you take the time to repair your brakes, the entire braking system might be damaged which will be expensive to fix. Apart from needing to fix the entire braking system, other parts such as shocks, the suspension system and the entire body of your truck might suffer. Fixing all these will be costly. 

Conclusion

Usually, the braking system plays a vital role in your truck. Besides bringing your truck to a halt, braking systems are essential in controlling road accidents. The system is composed of several parts that work together. The brake pads are the ones that play a significant role in controlling the speed as well bring your truck to a halt. Their role and location expose them to a lot of friction, and the materials they are made of wear out every time.

After attaining a specific mileage, it is necessary to replace the brake pads. If you ignore replacing them, they might damage the brake rotors or even the entire braking system.

Steps to Remove Stuck Lug Nut On Truck Wheels

A stuck lug nut can be hard to crack, requiring a lot of keenness so as not to damage your rims. After reading this guide, you will know how to remove stuck lug nuts safely as part of your routine truck maintenance.

Lug nuts become stripped due to various reasons. When they are corroded and rusty, when you use the wrong socket and incorrect torque, and when trying to remove your wheel, you will realize that one or more lug nuts are stripped. If this happens, consider performing the below procedure.

Use an Extractor Socket, Breaker Bar, or Hammer

Using these tools is the best method, with an accuracy rate of 99%. Such tools are readily available in your garage. You will need a breaker bar, penetrating oil, a hammer, and a socket. Before performing this procedure, ensure your truck is parked on a flat surface. You can also use the wheel chocks if you engage the emergency brakes.

Use penetrating oil to soak the stuck lug nut, which will do away with rust covering it. After soaking it, fix the long socket and hit it using a hammer. Be cautious when doing this so that you do not hit your fingers.

After hitting severally, you can remove the socket, insert a sizable nut extractor, and hit it with a hammer.

At this point, the lug nut has started to soften. Attach your breaker bar and use a little force to remove it. 

Use a Blowtorch

Using a blowtorch is the fastest process, but not everyone has it. If you have it, you will need a wheel spanner or plier, which will help you to grab the lug nut after getting hot. When using a blowtorch, do not use oil because it might cause a fire.

Use your blowtorch to heat the nut, be cautious and heat the lug nut slowly. After it has got adequate heat, you can leave it to cool down. Repeat this until your lug nut becomes loose. The secret behind this procedure is that the wheel nut expands as it becomes hot, making it easy to remove the stuck lug nut.

Use a Grinder/Wrench

Here you will also need a penetrating oil. Never forget to let it soak to remove the rust surrounding it.

Use your grinder to make edges around the nut, enabling you to grab it with your wrench. After getting a good grip on it, use a wrench to turn it until it becomes loose.

Use a Screwdriver, Chisel, or Hammer

When all the above procedures have failed, consider doing this. First, apply penetrating oil around the stuck lug nut and give it time to soak. 

Use your chisel to push the screwdriver into the nut. Doing this will create a notch on the surface. Wedge your screwdriver into the notch and tap it using a hammer in a counterclockwise direction. Do this until the lug nut breaks loose.

Conclusion

Removing a stuck lug nut can be hectic, but with adequate knowledge provided in this guide, you can do it using some tools that are locally available in your garage. 

When Should You Replace Shock Absorbers of Your Truck

Do you ever replace shock absorbers in your truck? The shock absorber plays the role of ensuring that the wheels of your truck are in complete contact with the road. They also control the movement of the springs and suspension to offer you a smooth ride. The shock absorbers never take the entire weight of your truck. Instead, they will take the kinetic energy generated as the suspension moves and changes it into thermal energy. 

When driving under normal conditions, your shock absorbers will serve you for 50,000 miles. It is necessary to replace shock absorbers as soon as they show signs. 

Symptoms of a Bad Shock Absorber

Vibrations

The shock absorbers have valves or seals that usually wear out, and if this happens, the fluids will flow past the valves. On such an occasion, your truck will vibrate when driving.

Truck Swerving When Braking

Your truck will likely develop handling issues as the fluid flows past the seals, leading to monumental movement within the cylinder. The weight of your truck might be challenging to manage when trying to make a turn. In addition, when you apply brakes, your truck might stop further than expected.

Uneven Tire Wear

When your shocks are worn out, keeping your truck on the road becomes hard. Your truck will bounce whenever it comes into contact with an imperfect surface. An area of your tire will have typical wear, but the rest of the tire will not. It is referred to as uneven tire tread, which escalates to further handling issues. Replacing a tire with this problem will not offer a permanent solution, but check and replace shock absorbers

Increased Stopping Distance

When your shock absorbers are faulty, your truck will take time to stop when you press the brake pedals. An increased stopping distance of 20% can make a big difference when trying to avoid an accident.

Whenever you realize that your truck takes time to stop when your press the brakes, it is due to faulty shock absorbers.

Cracked Bushings

Sometimes it is necessary to perform a visual inspection on your truck and check the condition of your shock absorbers. Each shock has ends where they bolt to your truck. There are rubber bushings at these ends. The rubber bushings usually crack when the shock absorbers are faulty. When this happens, your truck will produce noise as you run over a bumpy road.

Fluid Leakages

Sometimes the seals around the shock shaft develop leakages. In such a scenario, you will see fluid running on the body of your shock absorber to the pavement. Whenever the fluids leak, the performance of your shock absorbers reduces, and they will never function normally. When this happens, you will experience handling difficulties as you drive your truck. 

Conclusion

The cost needed to replace shock absorbers varies depending on the model of your truck and the labor cost. It is necessary to know the signs of a damaged shock absorber so you can tell when to replace them.

4 Symptoms of Bad Alternator System in a Truck

In this guide, we will look at how to know when you have a bad alternator in your truck. The electrical system is an integral part of your truck, which is the source of entertainment, gives you vision at night, and enables you to signal other road users. The electric system will allow your wipers to work effectively in heavy rain. There must be a power source for all these electric parts to function effectively. The alternator is the primary power producer of any truck. As the name suggests, it changes the energy from the engine to that which can be utilized by the electrical parts of your truck.

The alternator plays the role of charging the battery of your truck, and it is connected to the battery, so the battery does not run out of power. The work the alternator does stresses it, and at some point, it breaks down. This guide will focus on some symptoms that will let you know if your alternator is faulty.

4 Symptoms of a Bad Alternator

The battery warning check light on the dashboard is the most common symptom of a bad alternator, sometimes your headlight will not be stable when put on. You may also hear a funny noise from the engine. Now you know the most common signs, having an in-depth look at them will cause you no harm.

Battery Warning Light

The appearance of a battery warning light on your dashboard clearly indicates that your alternator is faulty. How will the appearance of the battery check tell you that your alternator is defective? When your ignition is on, your battery’s voltage is over 13 volts. A healthy truck battery has 12 volts, which will shoot to 14.2 when the alternator charges it. When the voltage drops to 13 volts and the ignition is on, the battery check light will appear on your dashboard.

Dim Headlight

The headlights consume a lot of power, and thus they need a lot of electricity. When they receive adequate power, they will be very bright. As your truck runs, the headlights will consume the light on the alternator. A faulty alternator will not supply adequate power to the headlights, making them not light bright.

Battery Starts to Drain Faster

You will be charging your battery regularly, but it keeps draining even if it is still healthy. When you note this, the alternator could be faulty. A faulty alternator will supply the battery with inadequate power, and other electric parts of the truck will depend on the power from the storm, which will drain it very fast.

Funny Noise from the Engine

The alternator has bearings and spinning components that are metallic. If it experiences any physical damage, your truck will produce a loud squealing or banging nose. Faulty bearings mainly cause noise in the generator. You can easily spot your truck’s alternator from the engine bay, so you can easily open it and check the cause of the noise. This is one way of knowing whether you have a bad alternator.

Conclusion

The above four are some common symptoms of a bad alternator, knowing them quickly lets you know the right area to check if you experience any of these signs. This is something that most people do not keep in mind when doing regular truck maintenance.

What Causes Oil On Spark Plugs In My Truck Engine

Have you ever asked yourself what causes oil on spark plugs in a vehicle? If you have, then this guide will detail all you need to know about that. The ignition system has various components that work together to initiate combustion in the engine. Any faults or irregularities in the spark plug could cause problems in the ignition system. For a spark plug to function effectively, it has to be in a conducive environment. 

The engine has three vital liquids, oil, water, and fuel, and such liquids should not mix. If they end up mixing, your truck’s engine will likely break down or experience technical problems.

What Causes Oil On Spark Plugs

Oil is an important component of your engine. It lubricates and helps the moving parts run smoothly. When you see oil on spark plugs, it indicates oil in the combustion chamber, which might not be the best indication for your truck. Here are some of the common causes of oil on the spark plug.

Leakages on the Valve Gasket

The engine has a valve cover that fills the wells, and the spark plug has O-rings around its holes. These holes can be external or integrated with the valve gasket. Heat destroys the valve gasket, if this happens, the oil will leak into the spark plug holes. 

When your truck fails to start, check the condition of the spark plug. If you find the whole of it has oil, consider replacing the valve cover gasket and the O-rings around your spark plug.

Faulty Crankcase Ventilation

The oil at the tip of your spark plug indicates that it is coming from the combustion chamber. The existence of oil in the combustion chamber should worry you because it is a bad sign. When you have faulty crankcase ventilation, the oil will find its way into the combustion chamber and the tip of your spark plug.

The blockage on the crankcase ventilation creates a lot of pressure, leading to oil being forced into the combustion chamber. 

Faulty Turbocharger

You will observe oil on your spark plug when your turbocharger is faulty. If oil leaks from the turbo inlet compressor sealing, it will pass through the combustion chamber to the spark plug. If such happens to your truck, check the crankcase ventilation. Sometimes the intercooler and intake pipes can be filled with oil, damaging your turbocharger.

Damaged Valve Seals

The valves regulate the flow of air and fuel into the combustion chamber and allow the exhaust gases out of the combustion chamber. The valves close after adequate air and fuel have entered the chamber for all the activities to occur in the combustion chamber. The outlet valve will open to eliminate the exhaust gases from the combustion chamber. 

When the valves are faulty, the oil will quickly get into the combustion chamber. Once the oil is in the combustion chamber, it will quickly find its way into the spark plug.

Damaged Pistons

You are likely to notice oil on spark plugs when the pistons are faulty. The high speed at which the pistons operates exposes them to tear and wear.

Conclusion

The presence of oil on spark plugs should not be treated lightly because it will not enable your spark plugs to initiate combustion and the starting of the engine. Knowing the common causes of oil in the spark plug will aid you in checking specific engine parts to determine the cause.

Best Way To Get Truck Battery to Last Longer

If you are looking for a way to get truck battery to last longer, then this guide is for you. It becomes stressful when the battery of your truck goes flat abruptly. Several factors, like harsh weather conditions and how you use your truck, can affect the lifespan of your battery. You can prevent your battery from running flat. An average truck battery should last between three to five years of service. To avoid changing your battery every one or two years, check this guide and practice these simple methods.

How to Get Truck Battery to Last Longer

Here are some of the best-proven ways that you can be sure to get truck battery to last longer.

Always Test the voltage of Your Battery

A regular check on the voltage of your battery will save you from battery failure when on the road. Professional mechanics does battery checks, but there is a device you can use to check the voltage of your battery at home. 

A voltmeter is a device you can use to check the voltage of your battery at home. The digital voltmeters give very accurate readings. For good records, consider testing the voltage of your battery when your truck has been turned off for 12 hours.

To use a voltmeter, connect the positive lead to the positive terminal of your battery, then connect the negatives. After connection, the voltmeter will be able to read. The readings will be 12.4 and 12.8 volts when your battery is fully charged. If the readings are way below 12, consider calling a professional to inspect your battery.

Your Truck Should Not Spend Much Time Parked

The battery will not have time to charge when your truck spends more time in the parking lot. The battery will perform optimally when your truck is driven more regularly. It is necessary to take your truck out for a drive for not less than 30 minutes to warm up the engine and circulate the fluids.

If your truck sits for weeks, your battery will need attention when you want to use it. Always ensure it has a full charge and the level of electrolytes is correct.

Clean Your Battery Regularly

Dirt, dampness, and grime can cause leakages on the battery, which might lead to short-circuit. You can use a sponge to remove the grime and other impurities on the surface of your battery. 

The battery terminals and the clamps are prone to corrosion. Corrosion on such surfaces hinders current circulation. To give your battery a longer life, consider cleaning it to remove such impurities. When your truck is being serviced, you can tell your mechanic to clean the battery for you.

Never Use Electronic Accessories When the Engine is Off

Keeping the lighting system on or using the infotainment when your engine is off can drain your battery. When the engine is off, the alternator is not working, and the electrical system will drain power from the battery. 

Always check to ensure that all the electric components are off before leaving your truck. When leaving your truck, ensure it is locked. Doing this is for safety purposes, and also it will close the computerized system of your truck.

Conclusion

The battery should give you full service, but its lifespan varies depending on how you use your truck. After reading this guide, you will be able to know how get truck battery to last longer. Some of these pointers should be adhered to just the way you do your regular truck maintenance.

5 Things that Destroy Your Truck

In this guide, we will be covering some of the things that destroy your truck with the help of guiding you on how to get it to last longer. Your truck will start getting damaged the moment you take it from the showroom and drive it, and some habits like careless driving accelerate damage to your truck. Such practices expose you to high bills when you take your truck for repairs. Most drivers shorten the life span of their trucks deliberately. This guide will show you some things that destroy your truck yet you may not know.

5 Things that Destroy Your Truck

Here are some of the crucial things that you need to keep in mind to ensure that your truck will last longer.

Skipping Oil Change

Engine oil serves the purpose of protecting your engine. It cools, lubricates, and cleans the engine. As it performs these roles, it will become dirty and fail to be effective. The oil filter ensures that clean oil goes to the engine by trapping particles that might contaminate the engine. The filter gets clogged with time, making it impossible for oil to pass. It is important to do an oil change regularly.

A clogged filter triggers the bypass to protect the engine from starving. When the bypass valve is activated, the engine will receive unfiltered oil, which can cause severe damage to it. Your truck might start to burn oil as soon as its engine starts to become old. This will require you to check oil levels more often.

Driving on Low Gas Tank

Regular driving when your fuel tank is low can cause long-term damage to your truck. The sediments will start to accumulate in your tank with time. If your gas level does not go too low, this is fine. But when you drive on an empty gas tank, the fuel will be drained from the bottom of your tank, and the fuel pump may pick these harmful sediments that might be trapped along the fuel system or even the engine. The accumulation of deposits can damage your engine and the fuel system.

Rapid braking and Acceleration

Rapid acceleration and braking push your truck to its limits, damaging the drivetrain. Sudden braking wears out the brake pads, and they overheat, reducing their effectiveness.

Aggressive driving interferes with brake rotors, and wheel bearings, the turbo will start making noise, and your transmission system will also slip. All these lead to hefty bills when you take your truck for repairs.

Not Using Parking Brakes

The parking brake is also called the emergency brake, and most truck owners associate it with manual transmission. If your truck is automatic transmission and you put it into parking, a lock feature called parking pawl will be engaged. Parking without an engaging parking brake makes the weight of your truck rest on a single piece of the transmission system. The parking brake will engage the braking system to hold the entire truck.

Ignoring Various Warnings

When crucial parts of your truck start to wear out, there are warnings and signs that you will feel as you drive. Assuming these warnings cause further damage, which becomes costly to repair or can sometimes lead to an engine overhaul.

Conclusion

The lifespan of your truck depends on how you use and take care of it. If you are a little bit careless, you will spend more money repairing it, or even it might end up being rendered unroadworthy. 

Signs Of Broken Coil Springs in Your Truck

Do you know what signs to look for when you have broken coil springs? A truck’s suspension has various parts that enable it to work efficiently. The coil spring is one of the essential parts of the suspension system. Their primary role is to absorb shock, and you will have a smooth ride when your truck’s suspension system can adequately absorb shock.

Signs Of Broken Coil Springs in Your Truck

The coil spring and leaf springs have similar roles. They both offer a riding height, which is why you will find both in most trucks. The coil springs are made of round metallic wires, wound into a helix shape having gaps between each other. The coil springs convert the motion of torque to elastic potential energy, which will provide support again. Their role exposes them to a lot of stress which wears them out with time. Here are some of the signs of broken coil springs.

Noise When Turning the Steering

When the coil spring of your truck is broken or is getting into contact with the body of your truck, you will hear a noise when turning the steering wheel. Sometimes, the spring can lay against the chassis instead of the top mount bearing. If such happens, you will experience a high bouncing noise when turning.

Rattling Noise

When the coil springs are broken, you will experience unusual noises, which increase the more you ignore them. The noise becomes worse when you accelerate or drive on rough terrain.

Uneven Tire Wear

The suspension system plays the role of balancing your wheels and tires as you drive your truck. Your tires should receive an equal amount of wear as they rotate. Your truck’s alignment changes as the coil springs start to wear out. If this happens, you will realize that your tire treads have premature wearing, which can cause severe handling issues. Your tires can blow out if you never inspect them regularly. 

Too Much Bounce

The coil springs prevent your truck from excessive bouncing whenever you hit a bump. When the springs are broken, they will not be able to prevent bounciness from happening. Your truck will be shaky when driving, which might be worse when driving on a dusty road or uneven terrain. Controlling your truck will not be easy if the bounciness becomes too much.

Sagging Corner

If your coil spring is broken, the corner it stands at will start sagging. It is easy to observe one of the corners of your truck is sitting lower than the others. The stability of your truck will be affected by the sagging. It will lead to other symptoms, such as uneven tire wear and noises.

Conclusion

A good coil spring will give your truck stability and a smooth ride. Several factors, such as poor driving and regular driving on rough surfaces, can break your coil springs. When they are broken, your truck will not drive smoothly the way it used to. The above are some signs your truck will have when they have broken coil springs and need some replacement or maintenance. Driving with broken coil springs is risky to you and other road users. If you realize they are faulty, consider replacing them as soon as possible.

Top Truck Tune-Up Checklist

What are some of the crucial truck tune-up checklist that you always adhere to? Tune-up simply means an overall tweak which includes the truck’s ignition system, breaker points, and condenser are replaced or adjusted. The new distributor cap, rotor, and spark plugs are installed. The ignition timing is set, and the carburetor of your truck is adjusted. The term tuned thus means optimal performance. This guide will let you know what truck tuning consists entails.

Top Truck Tune-Up Checklist

Here are some of the top truck tune-up checklist that you should always keep in mind for the best results.

Replace the Essential Components of the Ignition System

The ignition system has various parts such as spark plugs, plug wires, coil, and electrical components, which ignites the mixture of air and fuel in the combustion chamber.

The Spark Plugs

It has an electrode that wears out due to high heat and electrode arc. You will realize your spark plug is worn out when your engine misfires.

If you want to replace your spark plugs, buy the plugs of the original equipment. To do this, check the manufacturer’s manual for guidance.

Ignition Wires

The ignition wires of your truck will break with time and stop functioning. Consider replacing your ignition wires if your truck starts rough idle, misfires, or has a dead cylinder.

If replacing the ignition wire, transfer one wire at a time from the old to the new cap. 

The Ignition Coils

The coils do the role of transforming the low battery voltage into thousands of volts. The coils will wear out as they receive high voltage electricity.

If you hear engine misfire, weak acceleration, or rough idle, conclude that your coils are worn out.

Leave Your Engine Run Clean with New Filter

A truck has various filters, such as oil, air, fuel, and cabin air filters. The filters prevent contaminants from reaching various parts of the engine and the truck. For instance, an air filter collects debris and prevents them from entering the combustion chamber. When the filters are new and clean, the performance and efficiency of your truck will increase.

Keep the Auxiliary System in Check with New Hoses and Belts

The engine has various pulleys, and the belts connect them to transfer the rotating power of the crankshaft pulley to parts such as the alternator, water pump, and other systems. The hoses transfer vital fluids, such as the coolant, throughout the engine. The belts and horses wear out as they function. Heat, cold, and daily driving habits are some of the common reasons why they wear out. When tuning your truck, consider changing all the belts and hoses.

Use the Right Fluid to Maintain Your Truck

Your truck needs various fluids to function normally. Some necessary fluids are the engine oil, coolant, brake fluid, transmission fluid, and power steering fluid. When these fluids are contaminated, the internal components can wear out quickly. Servicing these fluids can save you money before any expensive damage happens. Perform a regular inspection and change of these fluids.

Conclusion

The main aim of tuning your truck is to boost or maintain its performance. This guide has highlighted the vital truck tune-up checklist considerations that you need to adhere to.

Testing Condition of Engine Head Gasket For Efficiency

A blown engine head gasket is among the problems that one is likely to experience while using their truck. But there are a few more serious problems. Such issues are costly and take time to diagnose. So how will you be if there is a problem with your engine head gasket? This guide equips you with all the requirements to test for a blown head gasket.

Roles of Engine Head Gasket

The head gasket is located between your engine and the combustion chamber, and its primary role is to keep all the engine fluids in their correct channels. The head gasket’s job might sound simple but wait until it malfunctions. The head gasket near the combustion chamber is exposed to server forces and movements.

If its seals start to malfunction, your truck will run into various problems which can seriously damage your engine. 

Testing Your Head Gasket

The two most straightforward ways of testing your gasket are checking your oil and your truck’s exhaust. But, you can do a lot to try for your gasket. Here are some practical ways of testing for a blown head gasket 

Checking the Engine Oil

Looking at your engine is the simplest way of testing if your head gasket is blown. You will do this by pulling the dipstick and observing it. If your engine oil is low, you must drain it on a pan and watch it.

If it is milky instead of its original color, know it is mixed with coolant.

Checking Your Exhaust

If you realize your truck emits more smoke than usual, it might mean your head gasket is blown. When diagnosing excess exhaust smoke, you should know a few things.

First, your truck will produce more smoke when it is cold than when it is warmer, which is very typical.

Second, a blown engine head gasket produces a lot of white smoke, the color your coolant will produce if it burns in the combustion chamber.

Finally, the smoke should be excessive to determine if the problem is related to the head gasket.

Checking Spark Plugs

You will know you have a blown head gasket when you check your spark plug and notice its oil. Oil will get into the combustion as soon as your head gasket blows, and some will be on your spark plugs.

To know this, pull out your spark plug and keenly look at it.

Checking the Radiator

Checking your radiator will let you look for a few various things.

First, a blown engine head gasket will enable air into the cooling system, and your radiator will have a foamy mixture.

Sometimes, oil and fuel might mix in the system, and if this happens, you will notice a milky color in your radiator.

Conclusion

The head gasket gives a crucial function in your truck. If it blows off or gets damaged, your truck will not be able to serve you. Immediately when it gets damaged, you notice be keenly observing your engine. This guide has given you the most basic and common ways of testing if your head gasket is faulty.

When To Replace The Thermostat of Your Truck

Do you know when you need to replace the thermostat in your vehicle? If not, then this guide will take you through when you should do it. Several activities take place in the engine, which generates a lot of heat. Too much heat from the engine is dangerous as it can melt down the plastic hoses and seals. Apart from that, the engine itself can break down. The engine has a cooling system that ensures it works at its optimal temperature. 

What is a Thermostat?

The cooling system is a vital part of your truck, and it comprises various components such as the radiator, coolant, and thermostat. What is a thermostat? For the cooling system to function effectively, it has to have what triggers it. A thermostat is a temperature-sensing device within your engine. It opens and closes automatically to regulate the temperature of the engine. 

The thermostat closes when the coolant has just been released into the engine. When the coolant in the engine reaches a specific temperature, it will open to allow the hot coolant to flow into the radiator. The role played by the thermostat exposes it to wear. It is necessary to know the appropriate time to replace the thermostat. 

Signs that You Need To Replace The Thermostat

Your truck will exhibit some signs when your thermostat is worn out and faulty. Knowing such signs will aid you in determining when to replace them.

High Temperature

High truck temperature is the first sign that you need a new thermostat. The temperature of your truck can increase when the coolant level has gone down. But if you have just refilled your coolant and this persists. Consider checking your thermostat.

To determine that high temperatures result from a faulty thermostat, look for a spike in temperature. For example, your thermostat may be defective if your truck’s and engine’s temperature is cool but spikes very high within a short time.

Cold Engine

Mostly, people associate a hot engine with a faulty faulty thermostat, but when your engine is too cold, it is another sign that your thermostat is defective. A cold engine is dangerous and interferes with the operation of your truck.

The prominent role of a thermostat is to let the coolant move to the radiator. When the thermostat remains open, the coolant will keep flowing regardless of your engine’s temperature. It will make your engine cold and bring mechanical problems to your truck.

Problems with the Temperature Gauge

The easiest way of accessing your thermostat is by checking the temperature gauge. You must have needle nose pliers to remove your thermostat.

After removing your thermostat, consider cleaning it and placing it in hot water. Before doing this, consider checking the temperature of the water. Check the temperature gauge when the thermostat is in hot water. If it does not spike, then your thermostat is faulty.

Conclusion

Shared in this guide are some of the things to watch out for to determine whether you need to replace the thermostat. Between your engine and the coolant, there is a thermostat whose primary responsibility is to ensure that the coolant flows in and from the engine when necessary. When it becomes faulty, your engine will either overheat or become cold. Knowing the signs of a faulty thermostat will enable you to determine when you need to replace the thermostat.

How To Know You Have Bad Piston Rings in Your Truck

How do you know that you have bad piston rings in your truck? The internal combustion engine has cylinders. The cylinders are the powerhouse of your engine. Inside the cylinders, there are pistons that have rings around them. The rings’ primary function is to help keep the combustion chamber pressurized, making it easy for combustion.

How To Know You Have Bad Piston Rings

The piston rings are the primary seal between the piston and the walls of the cylinder. If the rings wear out or fail, you will experience your engine becoming less powerful, together with other problems. This guide will focus on the common signs your truck will give when it has bad piston rings.

Emission of Blue Smoke

When your piston rings are worn out, your truck will start to emit blue smoke. The blue smoke results from oil getting into the combustion chamber and mixing with fuel and air. This mixture produces a blue smoke when burning. When you see blue smoke, consider consulting your mechanic as soon as possible. If you ignore these warnings, your truck will develop other serious problems that might be costly.

Weak Acceleration

The combustion chamber loses pressure when the piston rings are damaged. Less pressure in the combustion chamber will lead to poor acceleration as your engine will lose power since the pistons cannot effectively compress the air-fuel mixture.

When you press the accelerator pedal against the floor, but your engine is still not giving you adequate power, consider checking and replacing your piston rings. Doing this will restore the compression pressure.

Oil Leakages

High pressure develops inside the crankcase and interferes with the sealings of the engine. Poor sealing makes oil leak. When you experience many leaks, consider checking the pressure in the crankcase of your truck.

To check the crankcase pressure, leave your engine idle as you carefully open the oil cap. You should not experience any pressure while doing this, but your piston rings might be faulty if the oil cap flies away with smoke pouring out.

Oil Disappearance in Large Quantities

When your piston rings are faulty, they will not stop oil from leaking into the cylinder. When oil leaks into your combustion chamber, the chances of it mixing with fuel and air are very high.

Your oil will leak into the combustion chamber gradually, which will make you experience a drastic drop in the oil level in your truck. Drastic drops in oil levels will compel you to refill it regularly. 

If you were used to changing the oil after every 5000 miles, you might find yourself doing it at 3000 miles. When you experience such an event, stop wasting your time and book an appointment with your mechanic as soon as possible. A professional mechanic will take time to diagnose your valve seals and piston rings and give necessary advice according to their findings.

Conclusion

The piston rings provide sealing for the piston. Good sealing prevents oil from getting into the cylinders and also offers the needed pressure within the cylinder. When your truck has bad piston rings, it cannot function effectively and needs to be tended to.

How To Diagnose the Ignition System of a Truck Easily

Do you want to learn how to diagnose the ignition system of a truck? The ignition system is the part of your truck that you should inspect whenever you perform general truck maintenance. Checking it does not consume much time and saves you from frequent breakdowns. 

How To Diagnose the Ignition System of a Truck

This guide will detail how to diagnose the ignition system of a truck, which is otherwise similar in many other vehicles.

The ignition has low-tension connections. Consider checking if they are tight and are not corroded. You should also check if all the low-tension wires are well insulated and if no cracks have formed on them.

Check The Leads

Check if the leads are clean, dry, and crack-free. If your truck has special guide clips, check if the leads are running inside them. The clips play the role of protecting the leads.

If the leads are dirty, use a soft cloth to clean them. If they are not in good working condition, consider replacing them. It would help if you replaced the high-tension leads every three years. Doing this will help in maintaining the peak performance of your truck.

Check if the spark plugs are well fixed on the leads and if the leads are well connected to the distributor. When doing this, have sticky tape to make tagging, so you do not mix up the connections.

The threaded collars are used in screwing the leads vertically into the distributor and are held by crimped terminals or tiny screws.

Check if there are cracks on the distributor and the plug caps. You will have to pull off the plug caps one after another to do this. Pulling one after another will protect the lead from damage. Wipe the tops of the porcelain plugs.

Remove The Distributor Cap

It may have spring clips or two small screws. When removing the distributor cap, do not drop the spring clips or the screws. Inspect if there is any crack inside the cap. Check if the sprung carbon brush at the top can slide freely up and down. There is a spring contact on top of the rotor arm. Check if this spring is free from damage or wear. You might find the roto-arm tip dirty. All you need to do is to lift off the arm and clean it by scraping. Scrapping will also remove corrosion around the rotor-arm tip.

Narrow pipes run from the distributor to the inlet manifold. If you have an older truck, these pipes will be metallic. Most of these pipes are plastic which is a push-on fit. Inspect and check the physical conditions of these pipes.

Check the Coil

The standard type has a thick HT lead flanked by two smaller LT leads. Check if the lead is correctly fixed to the coil and distributor, and ensure that the rubber seals are well fixed. Ensure that the coil is fixed adequately on its mountings.

You will see two leads from the switch to the coil, one going through the resistor while the other bypasses the resistor and provides an additional ignition strength. 

Conclusion

The ignition system has various parts. To diagnose the ignition system, it requires one to have prior mechanical mastry. If you haven’t done it before, consider the services of your mechanic. 

How to Troubleshoot The Starter Circuit of a Truck

In this guide, you will learn how to troubleshoot the starter circuit of a truck. The starter system is simple, and troubleshooting is not complex. All you need are a few tools like the voltmeter, test lamp, tester, and a spanner to check the starter pinion is jammed in mesh with the engine flywheel. As you read this guide, you will understand how to troubleshoot the starter system of your truck.

How to Troubleshoot The Starter Circuit

If you would like to know how to troubleshoot the starter circuit of a vehicle, then the pointers below will help you through that.

Checking the Starter Pinion

You need to switch on your headlights and try the starter. If your headlight is dim, the starter is jammed in the mesh with the flywheel. Check if there is a square stub on the end of the starter-motor spindle. If you see it, use a spanner to turn it, and the pinion will be freed. 

Before you start working on the starter, ensure the pinion is freed. If you haven’t seen the square stub and your truck is a manual transmission, consider putting the gear level in the second gear with the ignition off, release your handbrake and rock your truck forward and back until you feel the pinion frees itself. For automatic transmission, you will have to take the motor off. When the headlights are still dim, consider checking for electrical faults.

Checking for Electrical Faults

When checking for electrical faults, consider checking the entire battery. Use a tester to confirm if the current reaches the solenoid.

Testing Power output

Connect the tester between the solenoid and the output terminal to check for the solenoid tester current. Connect one lead to the battery side of your solenoid and earth and the other to bare metal on the body of your truck. If the lamp lights, the solenoid, or the starter is the issue.

Sometimes the lamp may light when you earth it to the body, but not the engine of your truck, in such a case, the engine strap might be faulty. The connection between the solenoid and the battery might be defective if the lamp does not light.

Checking the Solenoid

You need a helper who will operate the starter switch as you listen to the solenoid to check if it is working. If your solenoid works, you will feel it producing a clicking sound. The ignition switch or its terminals might be faulty if it does not work.

To know if your solenoid is delivering power to the starter motor, consider connecting the test lamp between the output terminal and the earth, specifically the battery earth terminal. If your starter switch is working, you should be able to see the lamp lighting. 

Sometimes your lamp might fail to work. In such a scenario, put your truck in neutral gear, put off the ignition, and try to bridge the two terminals of the solenoid.

Checking the Battery

Connect the voltmeter on both the battery terminals and the readings should be 12 volts or more. As the voltmeter is connected, turn on the starter switch the voltage should drop to 10.5. If the voltage does not fall, there is a problem with the ignition switch or the solenoid.

Conclusion

Having gone through this guide, we now hope that you know how to troubleshoot the starter. If you are unsure what to do, consider getting some expert help from your mechanic.

Best Way To Easily Replace a Starter Motor of a Truck?

How do you replace a starter motor of a truck? The engine powers your truck, but it has to be stimulated to start performing its role. The internal combustion engine has various parts, one of these integral parts is the starter motor. The starter motor aids in the initiation of the engine to start functioning. Once the starter motor has initiated the engine, the engine will continue running on its power.

The starter motor is an electrical device that cranks the internal combustion engine. Once the engine starts to function, the starter motor gets disconnected from the engine, which runs from the power it generates. The starter motor is located at the gearbox housing, and its gears meet the flywheel’s teeth.

The starter motor has a powerful direct current electric motor and a solenoid as an electrical component. The solenoid receives power from the battery. The starter motor must be supplied with at least 12 voltage power from the battery to turn the engine. The starter motor will become faulty as it performs its roles. If it is not able to work effectively, you can replace it. This guide will let you know how to replace your starter motor.

How Do You Replace a Starter Motor of a Truck?

If you would like to know how to replace a starter motor of a truck, then here is how to do just that. The starter motor can be an electric part of your truck, in some trucks, it is a hydraulic part. When working on it you should practice and uphold safety measures. First, consider disconnecting your battery by removing the negative cable from the terminal. Doing this is a safety measure whenever you are working on your truck’s engine. To access the starter motor, you might need to raise your truck. You might find it hard to access the starter motor in some trucks. Consider referring to your truck’s repair manual before performing this process. You should choke your wheels as well as wear protective glasses.

Remove the Wiring

As you prepare to work on your starter motor, consider removing the wiring and cables connected to your battery’s terminals and the cable from the starter solenoid.

Remove the Starter and Bolts

Locate the starter bolts to remove the starter. Use the manufacturer’s manual to guide you to identify your starter motor and the bolts that hold it. Use the necessary tools to remove these bolts, you will be to remove the starter motor safely.

Make a Comparison for Verification

After removing the old starter motor, consider comparing it to the new one you have bought. Doing this will enable you to determine whether the new starter motor will fit your truck. Some starter motors might appear completely different, but they will fit your truck.

Transfer Heat Shield

You will find the new starter motor has a heat shield or brackets. Consider transferring them.

Secure then Tighten

Secure the new starter motor and tighten all the bolts holding it in place. However, do not overtighten the bolts.

Connect the Wiring

You have now installed your starter motor, and you should connect all the wirings you disconnected. Finally, connect your battery and try if everything is functioning well.

Conclusion

The process to replace a starter motor of a truck is not a complex procedure. Follow the instructions shared in this guide to do that.

How to Deal with a Clogged Diesel Particulate Filter of a Truck

Diesel-powered truck owners usually ask if it is possible to clean the diesel particulate filter on their own. Diesel particulate filters get clogged. When it happens, you should not worry because there is a way of cleaning it. All you will have to do is to dive the DPF clean. Your truck will do this automatically on a long drive, but most trucks will need a little help. This guide will inform you how to clean the diesel particulate filter if it gets clogged.

How Diesel Particulate Filter Works in a Truck

To understand the diesel particulate filter, we first have to look at the functions of the DPF. The diesel particulate is in the exhaust o your truck, and it does the role of collecting soot particles from the exhaust fume so that they do not pollute the environment. 

The filter collects fine soot temporarily. When driving after covering 1000 km, the filter becomes filled up with foot, which you must remove. To remove them, you have to regenerate your particulate filter.

How to Know When Your Diesel Particulate Filter is Clogged

Several factors will let you know that your diesel particulate filter is clogged. The most common scenario is when you see the filter malfunction light showing on your dashboard. The appearance of this light is a warning that your DPF is clogged. If your truck has no particulate filter light, the engine management light will show you that the DPF is clogged.

You will feel your truck is driving differently when the DPF is clogged. For example, your truck might shutter, or the rate at which it consumes fuel will go up.

Cleaning a Diesel Particulate Filter

Prevention will supersede cure, but sometimes it might be too late for prevention. If this happens, you must look for ways of cleaning your DPF. Cleaning will always be cheaper than replacement. There are two methods of cleaning your DPF. You can do it yourself, or you can seek the services of a professional, which might be costly.

Lindemann’s total care diesel cleans the DPF by lowering the combustion temperature of soot which makes it easy to burn, and this product contains a lot of cleaning agents. 

Apart from the diesel particulate filter, it will also clean your truck’s turbo, EGR valve, and intake system.

Avoid using additives when your DPF is filled with soot. The additive will compile and add on the soot and will not solve electronic or mechanical problems.

Conclusion

Diesel-powered trucks have been unfriendly to the environment. To regulate the level of toxins in their emissions, DPF was invented. Diesel trucks have been popular for producing too much smoke even if the entire engine is healthy. The DPF regulates this by temporarily holding the soot. As the soot accumulates, the DPF will be clogged with time. This guide has enlightened you on two popular ways of cleaning your PDF. If you cannot get the right cleaning agent, consider taking your truck to the nearest mechanic will help you remove the soot.

What is Engine Sludge & How To Remove it Easily in Truck Engine

Nobody wishes to deal with the engine sludge. The dark accumulation on the crankcase can cause a lot of trouble to your truck. Your truck’s engine is meant to run on clean oil, and it’s never your wish to deal with sludge. After reading this article, you will be equipped with knowledge of what sludge is and how you can prevent it.

What is Engine Sludge?

The black tarry substance in the motor is known as engine sludge. The primary cause of engine sludge is chemical reactions. The old motor oil will degrade when oxygen or high temperatures are exposed to it.

As the temperature increases, the degradation rate goes up. When the temperature rises to 18 degrees, the oxidation rate doubles.

The organic acids combined with the polymer products are some of the by-products of these chemical reactions. Such products will keep on reacting until they form sludge.

When starting to form, sludge will be the thin film that you might assume. It gets larger on the surface, which becomes messy.

How To Remove Engine Sludge

Use of Engine Additive

There are various engine additives that you can use to remove sludge from the engine of your truck. To get the right one, seek mechanical advice for you to use engine additives to remove engine sludge. Ensure your truck is parked on level ground, and remove the engine oil cap.

As you follow the instructions on the can, pour a can of the selected additive into your engine. After pouring it, fix the oil cap and let your truck run for 10 to 15 seconds. Doing this will warm up your engine because it is not your intention to drive with this additive in your engine.

Such engine treatment helps remove the sludge inside your motor by mixing it with dirty oil to flush it out.

Draining the Oil

After adequately warming your engine, you can now change the oil. First, you will need to get rid of the drain plug by removing it from the oil pan and let it drain into your drain pan. Some people prefer to use an air compressor to remove the sludge. However, doing this might introduce contaminants into your system.

Installing Filters

Use an oil filter wrench to take off the oil filter. Doing this will drain more oil from the system. Having a new filter compels you to put some clean oil on the gasket for it to create a seal. Turn the filter in a clockwise direction using your hands. Doing this will tighten it.

Adding Fresh Motor Oil

After draining all the oil from the system and installing a new oil filter, consider reinstalling the drain plug. Before using the oil, check its grade to ensure it is compatible with your truck. Such information is available in the service manual. The wrong oil will damage your engine.

Conclusion

Engine sludge can give a headache being that it is something that spreads. After reading this guide, you now know what engine sludge is and how you can remove it as part of your maintenance.

Signs of Bad Wheel Bearing in Your Truck

What are some of the signs of a bad wheel bearing that you should be aware of? The wheel bearings are with high precision for them to facilitate the smooth running of mechanical movements. They ensure that heavy loads are carried with ease. Trucks generally use various bearings, like a ball and roller bearings.

As long as you drive your truck, the wheel bearings will wear out at some point. When this happens, your truck will show some symptoms. 

The Signs of a Bad Wheel Bearing

Grinding and grating noise from the wheel when your truck is at high speed are some of the common signs of a bad wheel bearing. Sometimes the sound might change when either turning left or right. Other than these, here are other signs of a bad wheel bearing.

Your Track Feels Loose

You will feel the wheels’ looseness when your wheel bearings are bad. Bad bearings usually get lost inside the wheel hub and wheel spindle. If this happens, you have a loose feeling when steering your truck.

You will feel your truck is not stable as it used to be, such a feeling is terrible, and you have to replace your wheel bearing as soon as possible.

Play in Wheels

When you lift your truck’s suspension using a floor jack and feel the wheels play in all directions, it indicates a bad wheel bearing. In some situations, it can signify a lousy steering tie end. Some old trucks have a factory wheel play, which should not worry you. If your truck is new, something is wrong, and you should consider checking it.

Worn Patches on Your Tires

The level of damage on the wheel bearings can be high to the extent that it starts to interfere with the alignment of your wheels. When it interferes with your wheel alignment, you will notice your tires forming patches as they wear out. Performing a regular check will help you to identify this issue. In such a case, consider checking your wheel alignment and wheel bearings.

Your Truck Becomes Noisy When you make a Left or Right Shift.

When driving your truck at a speed of 50 miles per hour and hearing noise when you steer either left or right is an indication that your wheel bearings are bad. Sometimes the noise will vary depending on the direction you steer. For example, if the noise reduces when you turn right, your left wheel bearing is damaged, and if it decreases when you turn left, your right wheel bearing is damaged.

Grinding Noise from the Wheels

The wheels of your truck will be noisy when the wheel bearings are damaged. The grinding sound will be louder as you increase speed. Heat and water are known to destroy wheel bearings.

Conclusion

The wheel bearings rarely wear out, and they are essential parts of the wheel that can give you the worst driving experience when damaged, but they will quickly wear out when exposed to factors like heat and water. When they start to wear out, you will experience the signs from your truck. 

How To Troubleshoot Faulty Ignition System of a Truck Easily

In this comprehensive guide, we will go through how to troubleshoot faulty ignition system of a truck. The ignition system can be a source of headache in the garage. Especially when your truck runs perfectly, it starts to shake or won’t run in seconds. In such a situation, there must be something seriously wrong with your ignition system, and you must check as soon as possible. This guide focuses on ignition troubleshooting safety and how to troubleshoot the ignition system of your truck.

Ignition System Troubleshooting Safety

Before opening the hood of your truck, ensure you wear safety glasses and gloves, which will protect the soft tissues of your body. When handling the ignition system, you must come into contact with other engine parts and keep off the hot surfaces within your engine.

After opening the hood, locate your battery and disconnect it. Doing this will protect you from electrical shock.

How To Troubleshoot Faulty Ignition System

The ignition system is a chain composed of the battery, the spark plug, the ignition module, the distributor, and the coil. Like the chain, the entire ignition system will not work if any parts fail. Troubleshooting the ignition system will enable you to know the exact part that is not functioning.

Probe for Power

You will do this using the multimeter to check whether the ignition is supplied with adequate voltage. If it is not getting the required voltage, you will have to check if your battery is losing power and correct the issue. 

Sometimes, your ignition might be receiving high voltage. In such a condition, check if your resistor is functioning. In such a scenario, double-check the voltage using a multimeter before checking the resistor. 

Counter-Check Firing Order

If your truck misfires, you should verify the order and check it against your set-up on the distributing cap. Things might be jumbled up as soon as you install the distributor or the plug wires. 

Counter-Check the Initial Timing

Verifying the initial timing is necessary when working with the distributor. It involves breaking out the breaker bar and lining up the timing marks. When performing this procedure, you might be at 180 degrees, or the distributor might come out of the alignment, which can be caused by the loose bolt holding the clamp in place.

Test the Spark Plugs

 Suppose your engine misfires. Focus on the spark plug. Check for physical damages on the spark plug itself. If you can’t notice anything, consider using a multimeter. If the spark plugs are okay, consider using the multimeter to troubleshoot the spark plug wires. 

Test the Distributor

Testing the distributor varies depending on the application you have. To test the distributor, you will check the resistance in the entire system at specific points within the distributor circle. 

Test the Ignition Module

Testing the ignition module is the last step after troubleshooting everything. Testing your module relies on the model your truck has. Do some thorough homework before you test the ignition module.

Conclusion

Hopefully, you now know how to troubleshoot faulty ignition system of your truck, just in case you find yourself having to deal with it. It is necessary to know some of the symptoms of a faulty ignition system, which will help you troubleshoot and identify which part of the system is defective.

Dead Battery – What Causes The Battery Of My Truck To Die?

What causes a dead battery in a vehicle? In this guide, we will go through all that to give you better understanding. A truck battery is one of the electrical components that play a vital role in your truck. The battery is the source of power that ignites your truck and also powers other electrical parts when the alternator is off.

What Causes The Battery Of My Truck To Die

Several truck-related issues can make your truck not start. A faulty ignition can be the primary reason or even the wiring. When your battery is dead, your truck will not start. Several reasons can drain power from your battery. Letting your truck sit in the parking yard for a long time is one of them. Reading this article will let you understand the causes of a dead battery in your truck.

Leaving Your Headlights On 

After working the whole day, you all need to reach home as fast as possible to rest as you spend time with your family. As you rush to leave your truck and get inside the house, sometimes you might forget to close your truck’s doors or turn off the lights. 

The lighting system of a truck obtains power from the alternator, but because your engine will be off. It will drain power from your battery within a few hours.

Presence of A ‘Parasitic Draw’

When any electrical accessory is turned on, the power from your battery will drastically draw. Sometimes your truck cannot start even if all the accessories are off. If this happens, your truck might have faulty wiring draining your battery. Such is defined as a ‘parasitic draw.’

The alternator will charge your battery as you drive your truck. When you turn off the engine, the battery will not be able to charge. Such an issue can be solved by jump-starting your truck. Never jump-start your truck alone if you have never done it before.

Loose Battery Connections

If the battery wires are disconnected from the battery terminal, your truck will not be able to start. Sometimes the battery connections might be loose, especially when your daily drive is a bumpy road. The battery’s terminals might corrode with time, which will shut your engine down or get very little power to start.

The solution is to tighten the battery connector and regularly clean your battery to ensure that it gets adequate charge all the time.

Poor Weather Conditions

Cold or hot weather can either freeze your battery from the inside or deteriorate its chemical structure. If your battery is old, it will be affected by adverse weather changes. Sometimes, a new battery might also experience such an issue, weakening your battery and killing it with time.

Conclusion

A battery is an electrical component of your truck that has varied functions. But the primary function is to ignite your truck. For it to do this, it has to be charged and store power. Another role of the battery is to power other electrical components when the engine is off. As the engine runs, the alternator charges the battery and powers most electric components. This guide has elaborated on some of the common causes of a dead battery which you should know.

The truck is Shaking While Braking – Causes

Have you ever experienced your vehicle shaking while braking? The brakes in your truck are your lifesaver. The braking system gives you complete control of your truck at any speed. When braking, it should be as smooth as possible, but sometimes, it might never be as smooth as you may anticipate. In such a scenario, something might not be okay for your truck. This guide elaborates on some of the top reasons why your truck could experience shaking while braking.

Shaking While Braking – What Are The Causes?

Here is a comprehensive guide on some of the probable causes that one could experience their truck shaking while braking.

Damaged Brake Rotors

Sometimes, your brake rotors might be rusty, damaged, or even warped, making your truck shake when you apply brakes.

The brake rotors function as the discs. They are located between the brake pads and are attached to the hub assembly. The pads usually squeeze against the rotor, which will stop your truck.

Apart from shakiness, you might also hear some grinding sound when you apply brakes. Sometimes, it is only the front rotors that might be damaged. If such happens, your steering might be shaky.

Imbalance Wheels

Your truck will shake when your wheels are not correctly balanced. The issues of balance can result from driving with over or under-inflated tires. In such a condition, your truck’s suspension system will be straining, and your tires will wear out relatively faster. It would help if you considered doing wheel balancing to have smooth braking and driving.

Bent Rims

Sometimes when you drive carelessly over potholes or bumpy roads, the rims of your truck are likely to bend. Such a condition will make your truck shake whenever you apply brakes.

You can notice this as you are driving slowly or braking, but shaking will increase as your speed increases.

Problems with Your Suspension

Your suspension will take a beating whenever you travel on bumpy roads or potholes, damaging your suspension system.

Vital joints like the axle or cv joint will shake your truck whenever they are damaged.

Poor Wheel Alignment

Poor wheel alignment also can make your truck shake when applying brakes. Apart from this, poor alignment will drag your truck sideways as you drive on a straight surface. When your truck is veering because of poor alignment, you will realize that it is accompanied by shakiness whenever you are braking. If this happens, consider taking your truck for wheel alignment as soon as possible.

Worn out Brake Pads

The braking system has various components, one of these components is the brake pads. The brake pads are always two and between them is the rotor. The pads apply pressure on the rotor by clinging to it to stop your truck.

Various brake pads are made of components that wear out with time. When they are completely worn out, your truck will be shaky as you try to brake.

Conclusion

Ever experienced shaking while braking in your vehicle? All the components of your truck are made to function smoothly. Whenever your truck shakes, if you apply the brake, it signals that something serious is wrong with it. The above are some of the most common causes which you should know. If you experience it, consider taking your truck for a mechanical check-up as soon as possible.

How To Troubleshoot Windshield Wiper Fluid Not Coming Out

Several reasons can make you experience the windshield wiper fluid not coming out. Among some of the things that you are likely to experience when going about your daily driving is the windshield not working the way it should. This guide will focus on the common reasons and how to fix them as part of your truck maintenance.

Why is Windshield Wiper Fluid Not Coming Out

Let us go through this guide while we help you understand some of the reasons why you may experience your windshield wiper fluid not come out

No Washer Fluid

When you experience the windshield wiper fluid not coming out, the first step is to check on the amount f washer fluid in the reservoir. A standard windshield reservoir will hold 2.5 to 4 liters of washer fluid.

The washer fluid not only cleans the windshield but also helps to provide you with clear visibility as you drive. Whenever the fluid fails to come out, consider checking its levels and refilling it. If it does not come out, other parts might have problems.

Blocked Windshield Washer Hose or Nozzles

A clogged nozzle is likely to cause you to experience the windshield wiper fluid not coming out. If this happens, take the following steps to unclog your nozzle.

 Use of Compressed Air

The nozzle gets clogged due to the presence of debris. To remove this debris, use compressed air to blow the debris off. Doing this clears out all the materials which might have clogged the nozzle.

Use a Sewing needle

The sewing needle is another readily available. Ensure you use the smallest sewing needle to push through or pull out the debris in the nozzle.

Consider Checking the windshield washer hose

The rubber materials connecting the wiper fluid hose to your truck may leak as time passes, which is one of the reasons why your wiper fluid may not be spraying effectively.

Blown Washer Pump Fuse

The washer pump is one of your truck’s electrical accessories, which is protected by a fuse. The fuse prevents electrical short and overloading electricity. 

When the fuse is blown, the pump will not be able to function, and this is how you can troubleshoot it.

Locate the Blown Fuse

You can use a circuit tester if your truck has no tester light. Both the circuit tester and tester light will help you determine if your fuse is blown.

Remove the Blown Fuse

After the tester has determined that your fuse is blown, consider removing it and replacing it with one with a similar amp rating.

Do another testing

Reattach your wiper lines and try spraying to determine whether the system works perfectly.

Damaged Washer Pump Motor

The washer pump is connected to the washer fluid reservoir. If this electric motor fails to function, the switch will not turn on to pump the windshield washer fluid. You can troubleshoot it by doing the following.

First, you have to locater where the washer pump is, usually at the bottom of the reservoir.

Use the test light

Consider attaching your test light and have someone turn on the washer nozzles as they probe the back of the connector on the pump. If you have verified that the power system is perfect, replacing the washer pump motor is not necessary.

You can perform this at home or with the help of a professional mechanic.

Conclusion,

The wiper system is one of the electric components of your truck. At some point, it has to malfunction. If this happens, consider checking the areas outlined above to help you troubleshoot, and your washer fluid will be able to spray.

How Do You Adjust A Handbrake In a Truck Easily

How do you adjust a handbrake of a truck? Most trucks have the drum braking system at the rear wheels and the handbrakes operating directly on the brake shoes. When having problems with the handbrake, consider checking the cable before anything else. This cable might be attached under the belly of your truck.

How Do You Adjust A Handbrake In a Truck

If you are an amateur learning some stuff about the vehicle, then one of the questions you could be asking yourself is how do you adjust a handbrake of a truck? You need to jack up the rear end of your truck and follow the cable from the handbrake as you check for physical signs of damage. To effectively assess the cable, have someone in the truck operate the handbrake as you watch how it moves.

Check the Shoes and Adjust Them

4WD trucks have a small auxiliary drum brake mounted inside the brake disc. It has a pair of brake shoes similar to the drum brake. The shoes press against the drums. These shoes have a star wheel adjuster. The handbrake cable adjuster takes the remaining slack if the star wheel adjuster is used up.

You have to rotate the brake shoes to adjust them. Rotating will enable you to determine the lining left. If there is an excellent lining, use a screwdriver to turn the star wheel adjuster until you feel the wheel is locked.

If the cable needs to be adjusted, consider doing it at the U-shaped yoke or on the cable or the rod by using an adjuster nut.

Check the Shoes

After confirming the condition of the cable, consider checking the adjustment. Ensure you adjust the handbrake in all the disc systems in both parts. To adjust the handbrake cable effectively, consider adjusting the brake mechanism first. You have to locate the handbrake adjuster. While doing this, ensure the cable seats properly as they pass through the brake shoes.

Locate the adjustment access slot around the brake drum part of the disc assembly.

Star Wheel Adjuster

Look for the star wheel when the shoes are in good condition. The star wheel adjuster is located at the six o’clock position. To effectively work on the star wheel adjuster, consider lubricating it and its surrounding with oil. Doing this will give you an easy time to work on it.

After the star wheel adjuster has received adequate oil, consider turning it using a heavy screwdriver. Rest the screwdriver on the edge slot as you lever it against the arms of the star wheel. Keep turning the wheel until you feel the rear disc is wholly locked and it can no longer move.

When working on the star wheel adjuster, you might note that the adjustment slot is sealed by a blanking plug made of rubber or plastic. In such a scenario, use the screwdriver to remove it. 

Adjust Brake Cable

Sometimes you will need to adjust the cable. The handbrake cable is usually under your truck, similar to the typical drum handbrake. Most cables have the adjuster at the U-shaped yoke.

Conclusion

The handbrake is necessary, especially when parking your truck. Sometimes it might fail because it is composed of various parts. This guide will aid you in performing necessary adjustments to your handbrake.

What Causes A Whining Noise When Accelerating?

Causes of a whining noise when accelerating is the most dreaded question. You will walk into a car repair shop to have your truck repaired, but nobody likes being there. Some people use their trucks for transport, but some treasure them. When you treasure your truck, you will be keen on every detail to ensure that it operates smoothly.

Several things can make your truck produce a whining sound whenever you accelerate. The more you use your truck, wear and tear are inevitable, making most of its parts not function properly. This article will help you answer the above question by identifying some common causes of whining whenever you accelerate.

Causes of a Whining Noise When Accelerating

Faulty Serpentine Belt

The serpentine belt drives various components of your truck. Whenever you press the gas pedal, the serpentine belt will try to run as fast as possible to keep up with speed. In case of failure, you will hear a whining sound when accelerating.

The serpentine belt usually dries up and cracks with time. If this happens,  it will not be able to hold the pulleys firmly, and they will slip. 

Vacuum Leaks

If there is a vacuum leak in the intake manifold, your truck will produce a whining sound as you accelerate, which is common if your truck has a turbocharger that will expel air from the leak.

Your vacuum will leak when the hose is broken, and the leaks might be around the boost pipes in the case of a turbocharger.

Steering System Failure

The steering system has various components which might produce a whining noise when they fail. Some parts might constantly whine, while others will only whine as you accelerate. For example, your truck will whine when there is a power steering fluid leakage.

Worn-Out Bearing

A truck has various bearings which might produce a whining sound when worn out. The drive pulleys and other running accessories are some of the areas that have bearings. The alternator has internal bearings, producing a whining noise as you accelerate.

To locate a faulty bearing, consider removing the serpentine belt and rotating all the accessories and pulleys using your hands.

Problems with the Transmission

The engine generates power but is not directly attached to the wheels. The transmission is a link between the engine and the wheels. Its primary role is to ensure that the wheels receive power from the engine. The transmission will start to fail as your truck ages. When it starts to fail, you will hear the whining noise. It will grind as you change gears. Low transmission fluid is also likely to make your truck whine when accelerating.

Low Engine Oil

The engine needs an adequate amount of oil to ensure that all its parts function effectively. When the engine oil levels go down, you will feel the whining noise from your truck as you accelerate.

Conclusion,

The whining noise when accelerating is a bad sign. This guide has covered some of the common causes of this sound. If your truck starts producing such sound, consider taking it for a mechanical check-up as soon as possible.

Idle Pulley Noise – Causes in A Truck

Have you ever experienced idle pulley noise in your truck? The idle pulley has various bearings that wear out with time. This guide explains some of the reasons for a noisy idle pulley. Unusual noises from your truck can be very uncomfortable, and you need to investigate them as soon as you hear them. When your truck starts to produce the idle pulley noise, always never ignore it because it usually escalates into significant issues.

The pulleys perform the role of holding various belts in their respective positions. If one fails, other parts of your truck engine could be affected.

The idle pulley and belt are located at the front part of your engine. The belts usually rotate as your engine is rotating. To locate the idle pulley, you must look at the serpentine belt that moves on the engine.

Most trucks have only one idle pulley, but some have more depending on their configuration. Rail-type mounts give the idle pulley adequate tension, which puts it in its place. Some idle pulleys use spring tension.

Causes of Idle Pulley Noise

Worn out pulley or slipping serpentine belts are some f the common causes of idle pulley noise. If the pulleys are damaged, they will make a loud noise. Here are some causes of the idle pulley noise in your truck.

Damaged Pulley

It will completely break when your pulley shows signs of being faulty and you ignore it. When the wearing is constant, the pulley will develop cracks with time. The first time it will break a little bit, creating a chain reaction you never want to encounter. When your pulley is damaged, the serpentine belt will tear.

If your serpentine belt breaks, prepare to deal with more significant problems. Your engine will overheat or stall. You are also likely to hear a consistent squealing noise which will give you an annoying ride.

Slipping Belt

When your pulley is worn-out, it will give you signs. If you ignore this sign, the problem will escalate, and your belts will start to slip. A slipping belt happens when the pulleys are entirely worn out.

The pulley will bind and rub along the engine belt, producing squealing noises. The binding between the pulley and the engine belt will produce a squealing noise as your truck is in motion, which will get worse if you do not replace the pulley. The slipping belt can also damage other engine components, which will make you spend a lot during repairs.

Worn Out Pulley

The idler pulley usually spins with the drive belt as you drive your truck. The repeated use leads to wear and tear of the pulley. Your pulley will start to develop marks and scuff as it becomes old. The premature wear will cause minor noise but worsens gradually the more you ignore it. 

Conclusion,

When the idle pulley becomes faulty, your truck will produce unnecessary noise. This guide has covered the three common causes of idle pulley noise. Knowing such causes will enable you to make adequate preparations to repair the problems related t idle pulley noise.

7 Truck Detailing Tips To Save You Money

What are some of the truck detailing tips that you know? If you had taken your truck for professional detailing, you are more likely to pay more than $100 for a thorough job. If you wish to keep your truck clean by thoroughly working on it, this guide will give you all the details you need to perform this task.

Truck Detailing Tips To Save You Money

Here are some of the money-saving detailing tips that every truck owner needs to know about. It will also help keep your truck looking more valuable and last long.

Start From The Top

When cleaning your truck, it is normal to start from the bottom, and the assumption is that the bottom part of the truck is usually dirty and will require a little energy to work on. Starting from the bottom means that as you advance to wash the upper part, junk from the top will drop to the bottom and make it dirty.

When detailing your truck, you must start from the top such that when the dirt from the top falls, it will find the bottom already dirty, and you will only have to clean it once.

Suck Dust

The quantity of dust that comes into contact with your truck depends on where you often drive. Dust gets into vital parts of the truck, which you cannot easily access. Apart from access, some parts are delicate and may not need water to clean. You must use a vacuum cleaner to suck out the dust from such areas.

Remove the Odors From the Interior

The bad smell makes your cabin uncomfortable. Removing the odors is a procedure when detailing your truck, usually done after the truck is clean and drying up. It would help if you bought an aerosol can of a non-Smokey spray that will kill bad smells from your truck.

Clean the Seats

If your interior is made of leather, pre-treat them with a conditioner before you start cleaning. Cleaning the seats will remove any liquid or food particles that might have slipped on the seats. You will use locally available tools to clean your seats.

Rinse Your Truck Before Washing

Before washing your truck, consider using warm water to rinse it. Doing this will loosen the dust particles and make it easy for the soap to remove them. 

Deep Clean the Carpet

The floor carpet holds a lot of particles and dust. Performing a regular cleaning may not remove these particles. You need a carpet cleaner that will remove every dirt from the fibers. After this, take the carpet outside to get aeration and dry from the sunlight heat.

When you realize that your carpets are old, consider replacing them. Buying a new carpet is not expensive. Installing a new one in your truck elevates and gives it a luxurious feel.

Remove Off Stickers

Sometimes your truck was hired by some agency that covered your truck with their stickers. They may bring your truck when these stickers are not effectively removed. It is necessary to remove these stickers when detailing your truck. Use a degreaser and a fresh razor blade to perform this role.

Conclusion

Detailing your truck will restore its new look and also helps maintain its value. However, when you take your truck for detailing, you will part with lots of money. The detailing tips discussed in this guide will save you money because you will do them at home, most of which require readily available resources.

9 Symptoms of a Clogged Catalytic Converter

What are some of the symptoms of a clogged catalytic converter which you should be aware of? The catalytic converter is one of the components of the exhaust system. It neutralizes the harmful gases from the combustion chamber before expelling them through the exhaust pipe. Catalytic converters are prone to failure, and it is costly to replace them. Knowing the signs, your truck will show when the catalytic converter is faulty is necessary.

Symptoms of a Clogged Catalytic Converter

Here are some of the top symptoms of a clogged catalytic converter in a truck that you need to keep an eye on.

Check Engine Light

The appearance of this light on your dashboard is an indication that there is a problem with your truck. If the scanning of this check light reveals the error code related to the catalytic converter, use the user guide to decode the error code.

Acceleration Lag

Delays or reduced power when you press the acceleration pedal indicate that your catalytic converter is faulty. To determine if your catalytic converter is clogged, ask someone to press the acceleration pedal as you keep your hands on the exhaust system. If there is a larger amount of exhaust fume from the truck, your acceleration might be bad.

Irregular Fuel Consumption

Increased or decreased fuel consumption is a symptom of a bad catalytic converter. Low fuel consumption can ruin your engine, which might be very costly to repair.

A clogged exhaust system leads to improper combustion, and your engine will work extremely hard to produce the required energy. A clogged catalytic converter can lead to higher fuel consumption.

Bad Smell

Your truck will smell sulfur when the catalytic converter is damaged. The airflow into the combustion chamber will be restricted, giving your engine too much fuel. You will feel a bad smell in your truck when there is too much fuel in the combustion chamber.

Discolored Housing

When the housing of your catalytic converter turns blue or any other color is an indication that your catalytic converter is faulty.

Problems with Starting

When your catalytic converter is blocked, the engine will receive too much fuel, which it will not be able to burn. Back pressure will be generated, making it hard for the engine to eliminate the exhaust gases.

Increased Emissions

Your catalytic converter will not be efficient when it is clogged. Your truck will emit more harmful gases into the atmosphere. The catalytic converter’s role is to regulate and eliminate harmful emissions.

Misfiring Engine

Oxygen flow into the combustion chamber gets restricted when the catalytic converter is clogged, which will reduce the airflow into the combustion chamber leading to an increase in temperature due to the accumulation of unburnt gases, which will make your engine misfire.

Rattle and Other Noises

You will experience weird noises when your catalytic converter is clogged. A honeycomb inside the catalytic converter wears out and breaks into pieces. When the honeycomb is broken, you will experience a rattling noise from your catalytic converter as you rave your engine.

Conclusion

The catalytic is one of the parts of the exhaust system which can interfere with the entire engine when clogged. Knowing some of the signs of a clogged catalytic converter is necessary so that you can repair it earlier before it escalates into other issues that will need more cash to fix. 

4 Causes of Transmission Fluid Leaks in a Pickup Truck

What are some of the known causes of transmission fluid leaks you know? Here we will go through several of them. Your truck engine is the primary power source, and the transmission ensures that the engine’s speed and torque reach the wheels. It has a gearbox with gear and gear train for the above role. The transmission is made of several gears which are joined to one another. These gears are metallic, so they need proper lubrication for long life and to function effectively.

What is Transmission Fluid?

A truck has various fluids, the transmission fluid being one of the essential fluids of your truck. This fluid lubricates the transmission system’s components to operate optimally, and this function protects and cleans the metallic surfaces from wear.

The transmission fluid also functions as a coolant in trucks with automatic transmissions. As the automatic transmission functions, it generates a lot f heat which can be harmful to the entire transmission system, and it is this fluid that absorbs the excess heat from the transmission.

4 Causes of Transmission Fluid Leaks

The transmission fluid is prone to leakages, like any other fluids in your truck. Why does the transmission fluid leak? You will understand why the transmission fluids leaks in your pickup truck as soon you finish reading this guide.

Faulty Transmission Pan Gasket

Many people forget to replace the pan gasket whenever they remove the transmission pan, and instead, they install the old one, which starts to leak very fast. A leaking fuel pan gasket is the primary cause of a leaking automatic transmission.

The transmission fluid slowly eats the pan gasket, making them develop leakages quickly. Some trucks use sealer instead of a gasket, which also becomes worn and will need to be replaced.

Rusty/Cracked Transmission Pan

If your transmission pan is made of aluminum, be assured that, at some point, it will crack. It can crack when you hit a hard object under your truck while driving.

If your transmission pan is made of steel, it will become rusty with time and develop holes. It is necessary to keep inspecting your transmission pan to detect any signs of rust and replace it before the better part of it becomes eaten up.

Leakages on the Transmission Pan Drain Plug

Some automatic transmission systems have a drain plug, but some do not. If your truck has one, it is likely to leak. The drain plug has an O-ring sealing which you should replace whenever you replace your fluid. Many forget to replace the O-ring sealing, which leads to a leaking transmission.

Blocked Transmission Ventilation

The transmission system has a breather assembly that ensures an equilibrium pressure inside the transmission system. The breather lets the transmission breathe air when there is an expansion or contraction of air, and this lets the hot air out as the cool air gets into the transmission system. The ventilation gets clogged, which results in transmission fluid leaks.

Conclusion

The transmission fluid is essential in your transmission system. If you realize that your transmission fluid leaks, consider checking any of the above areas as the common causes. 

The Important Role of a Carburetor in A Truck Engine

Have you ever asked yourself what the role of a carburetor in a vehicle is? The fuel mixing in the internal combustion engine takes place in the Carburetor. It can be referred to as the engine’s heart, but only for older trucks. The new trucks use fuel injection for the same process.

What is a Carburetor?

The Carburetor is one of the components of the internal combustion engine that takes in the required amount of fuel and air necessary to support combustion in the cylinders. It is the heart of your truck’s engine, which enables it to run smoothly at the required horsepower.

A carburetor is designed to work perfectly in any weather. Whether it is cold or hot, it will perform normally.

How a carburetor performs its roles is a bit complex but is explainable. If there are adequate atoms of oxygen to burn all the fuel atoms in the combustion chamber, it is referred to as a stochiometric mixture, a term in chemistry.

In your engine, for proper combustion to occur, there must be 14.7 parts of air to 1 part of fuel. Sometimes the engine might have too much air with lesser fuel. In such an instance, your engine will be burning to learn. But when it burns rich, it has too much fuel and lesser air.

Role of a Carburetor

The carburetor has some of the below functions in a truck.

As mentioned, the primary function of a carburetor is to allow a suitable amount of air and fuel required by your truck to generate the needed horsepower, which happens at the correct strength under all your truck’s speeds and load conditions.

Regulation of Air-Fuel Mixture

The Carburetor does the role of regulating the air-fuel ratio. It has a unique screw called an air-fuel mixture screw, whose primary role is to control the amount of air that mixes with fuel in the combustion chamber. The adjustment of this screw varies depending on how your truck’s engine is idling or running.

Controlling the Speed of Your Engine

The speed of your truck will depend on the air and fuel mixture that gets into the combustion chamber. An increase in the speed means that the Carburetor will increase the flow of the air-fuel ratio in the combustion chamber.

It Helps Fuel to Burn Smoothly

The carburetor facilitates the process of combustion of fuel in the cylinders. For fuel to burn efficiently, it has to be supplied with adequate air (oxygen). The carburetor ensures that an adequate amount of oxygen gets into the combustion chamber so as for the fuel to burn effectively. 

Regulation of the Fuel Valve

The Carburetor has a float chamber whose primary duty is to rise and close the fuel valve when your truck is fully fueled. A lot of f fuel in the combustion chamber causes flooding. When the float chamber closes the fuel valve, the combustion chamber will not receive too much fuel, which might cause flooding.

Conclusion

We have now seen the critical role of a carburetor in a vehicle. The carburetor is an essential component of older model trucks. This part ensures the combustion chamber receives an adequate amount of oxygen and fuel necessary for the effective starting of your engine.

Tips To Save On Maintenance of Your Truck

Do you want to learn some of the ways that you can save on maintenance of your truck? If so, keep reading. Truck maintenance and service is expensive, and most truck owners are not interested in taking their truck for routine maintenance. The more you skip the routine maintenance for your truck, the more you expose it to various serious mechanical issues. 

Tips To Save On Maintenance of Your Truck

Fear of spending on routine maintenance should never worry you. Although the economy is on the rise, inflation is affecting the prices of everything. You can save on maintenance by doing the following. 

Never Skip The Regular Maintenance of Your Truck

You should follow the recommended maintenance schedules by changing the oil and filters on time and ensuring that your wheels are properly aligned. Apart from these, many issues are addressed when you take your truck for maintenance.

Performing regular maintenance extends the lifespan of your truck. Old oil, low transmission fluid, and worn-out tires are some of the few areas which can completely ruin your truck when you assume.

Read the Manufacturer’s Guide

The manufacturer’s guide contains all you need to know about your truck. It is in this guide that you will be able to know more about the scheduled truck maintenance. This guide is written by experts and elaborates on all you need to know about your truck. 

Do As Much As You Can 

Most truck maintenance tasks are easy, and you can do them independently. You can easily check on the condition of fluids in your truck and change spark plugs, oil, and filters. Performing most of the regular maintenance on your own will save you on mechanic labor. You can source parts on your own, which will be relatively cheap.

Learn Online

Google is the answer to everything before taking your truck for a mechanical check-up. There is much information online that will help you perform many procedures. The YouTube videos and various blog posts will give you a detailed step-by-step guide on performing various maintenance for your truck. Online is the most modern way of working on your truck, but if you love going traditional, you can grab your user manual and start working.

Get Parts Online

It would help if you did prior planning for your maintenance. You should know the parts you need and the source for them. When buying such parts, consider sourcing them from where you can receive discounts. Usually, consider purchasing parts online, you will get them at better prices, and most online stores offer free shipping.

You Should Know Maintenance Rates

The cost for basic service maintenance, such as oil changes, and tire rotation, varies depending on the shop you visit. Always ensure you are charged fairly for these services by researching rates before settling on a specific mechanic for help. Many mechanics are available online. Consider checking them and comparing their rates. 

Conclusion

Truck maintenance can siphon some good cash from your pocket. Several issues arise when you take your truck from routine maintenance. It is necessary to have tips that will help you save on maintenance, and that is what this guide was all about.